Some days ago a friend of mine told me it would be very hard to start with Apache Camel as a Java Developer because the documentation is missing or very hard to find.
I know there are some other tutorials out there but some of them are outdated or contain too much content for a simple getting started guide.
Therefore I decided to write this blogpost to help other developers starting with Apache Camel and Java.
This post describes how to create a new Maven based standalone Apache Camel project using the Java DSL.
Standalone means it's a plain Java application and not integrated in a Spring application, an OSGI bundle or something like that.
Create a Camel project via console
You can use the following snippet to generate a Apache Camel project with a small sample routing logic using the Java DSL.
mvn archetype:generate -DgroupId=com.schulz.bennet -DartifactId=camel-start-java -DarchetypeGroupId=org.apache.camel.archetypes -DarchetypeArtifactId=camel-archetype-java -DinteractiveMode=false
Create a Camel project via IntelliJ
Just in case you don't like the console that much you can use the IntelliJ wizard as well.
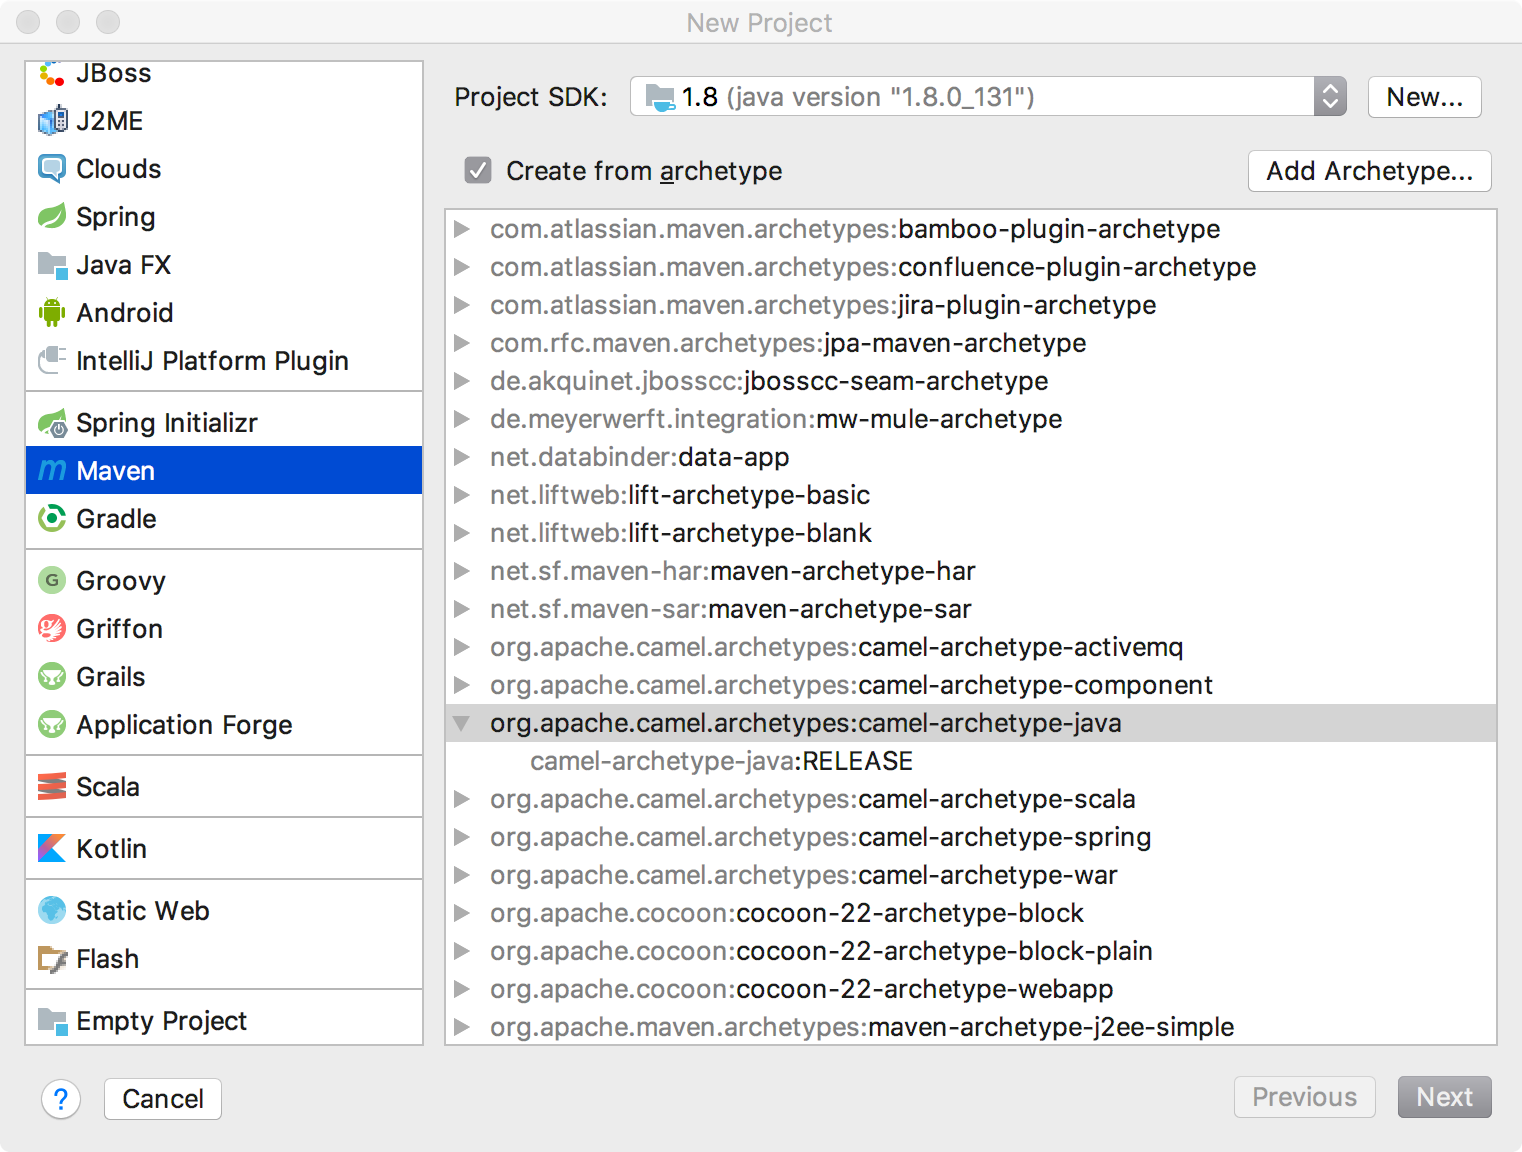
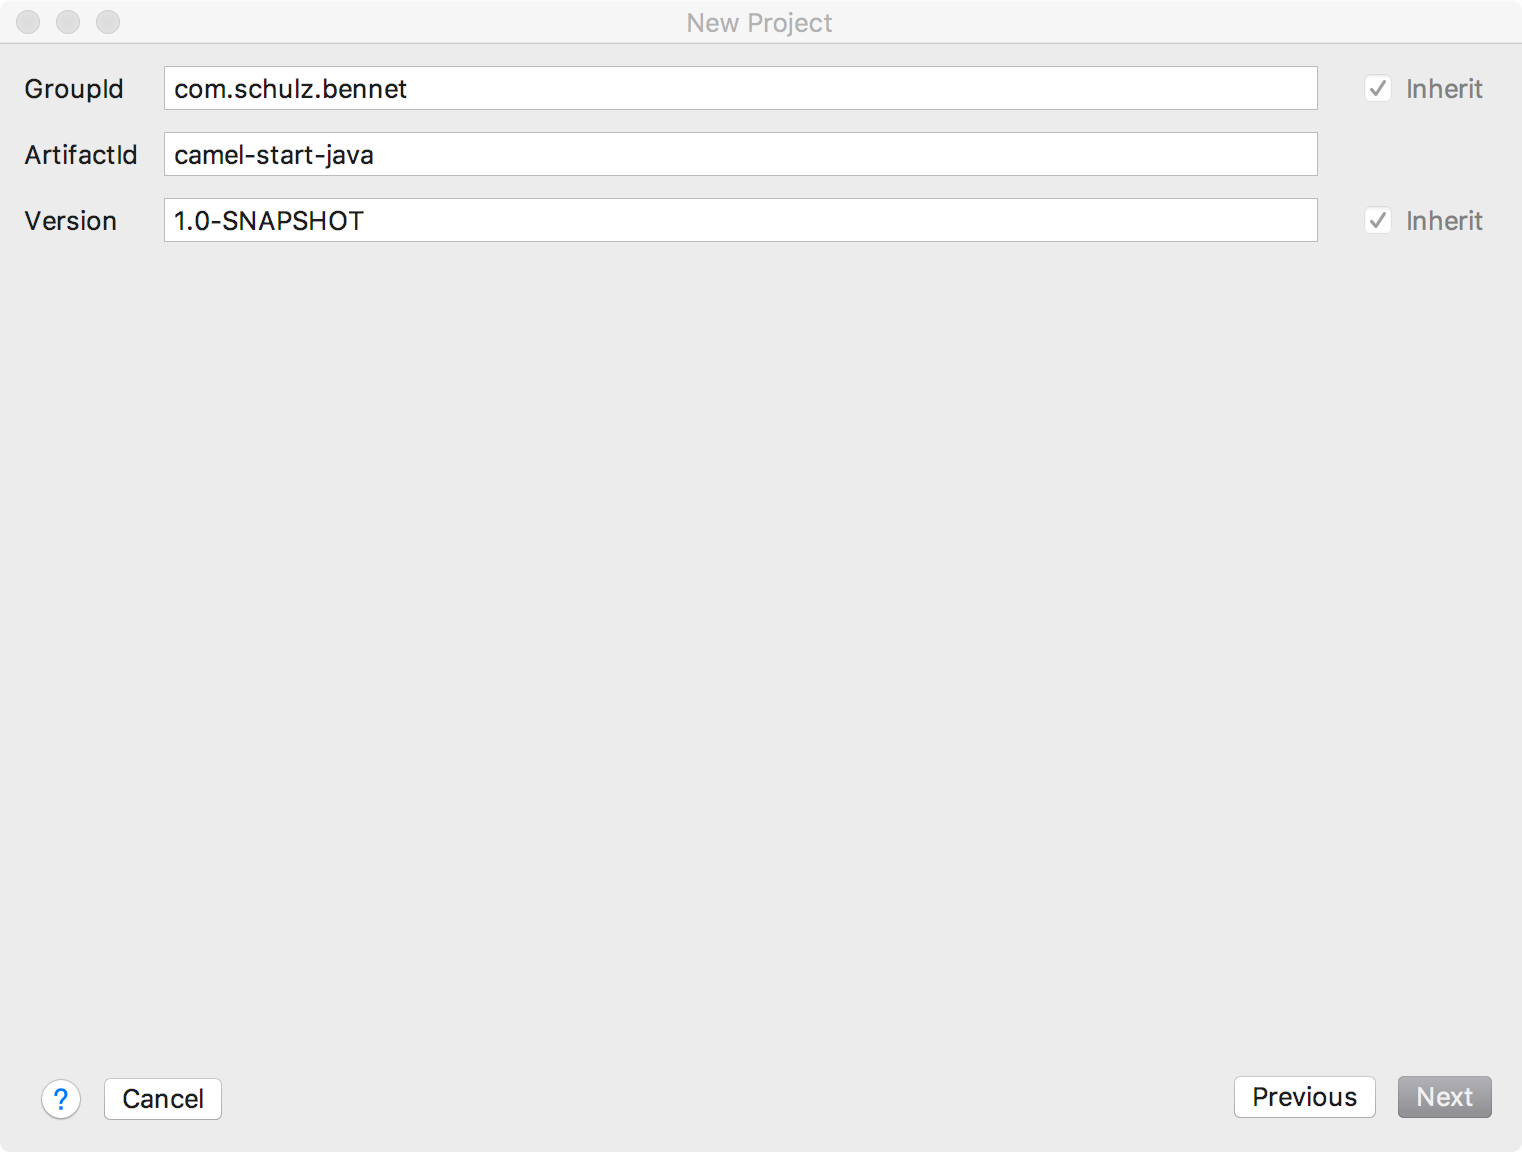
Open IntelliJ and click on File -> New -> Project... -> Maven. Now enable the Create from archetype checkbox and select org.apache.camel.archetypes:camel-archetype-java.
Understanding the sample project
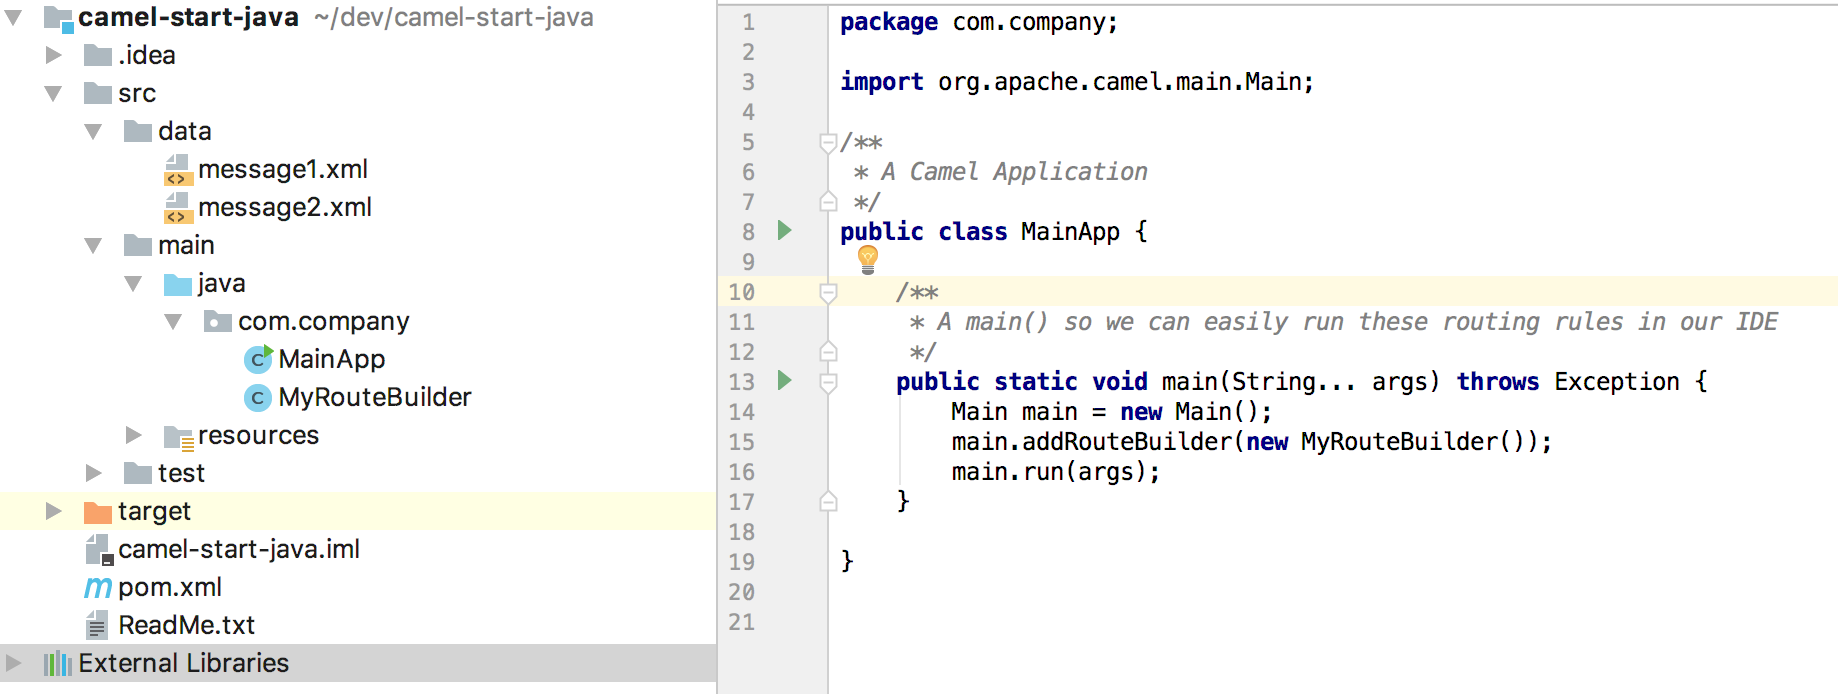
In the sample which comes with the maven archetype there are two classes: MainApp and MyRouteBuilder. The Main App looks like this:
Note: It's also possible to create a CamelContext on your own instead of using the Main object for it, but I recommend using the Main object for it because you don't have to add code to keep the JVM up and running. The Main object takes care of it and will run as long as you don't terminate the current JVM.
You have to use this Main object to add Camel routes to it. A route is a class which contains integration logic like inputs, transformations, endpoints and so on. It's comparable to a graph which has exactly one source and one sink.
The Camel route in this sample is named
MyRouteBuilder.
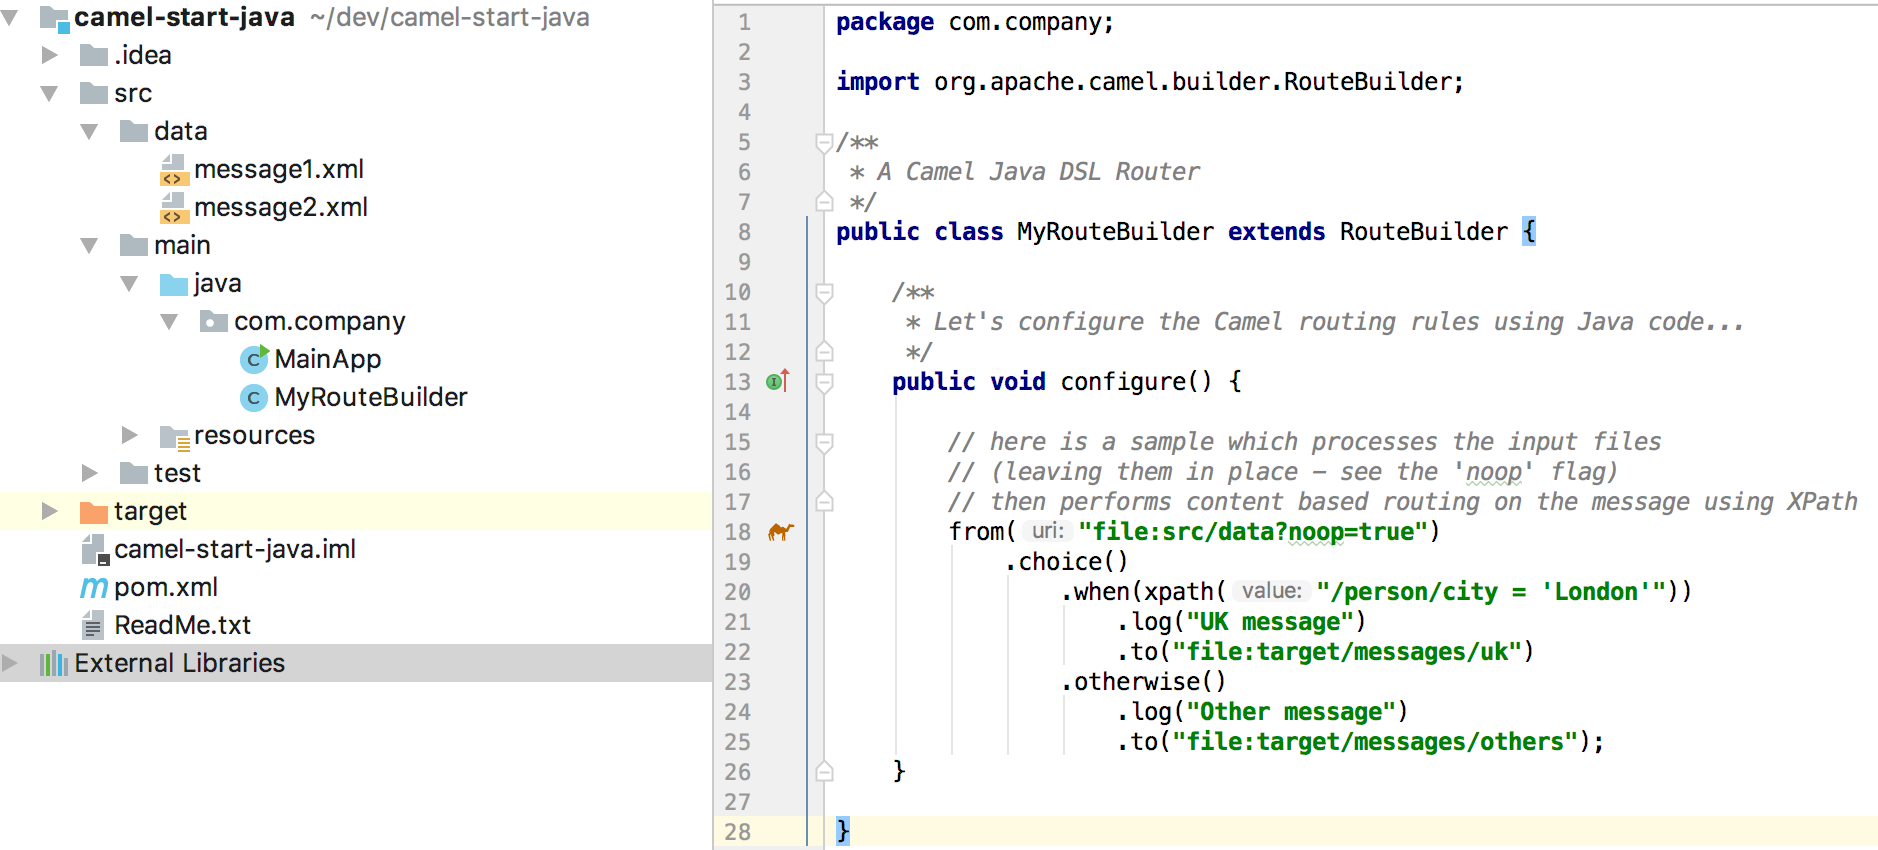
A route class has to extend the RouteBuilder class. In addition to that it has to override a configure() method which contains the routing logic.
In this example it contains a logic which reads files from src/main/data by using the file component. (see: Apache Camel File Connector)
Note: components can be configured by adding it in HTTP query parameter style. In this example the 'noop' configuration means that the files in the
src/main/data directory should not be moved or deleted.
As you can see in the IntelliJ snippet, processing steps are added to the route by using a builder API starting with a from() method call. This from() call contains the file component described before. In the next processing step there is a choice() method call followed by when() and otherwise() calls. These two method calls take the output of the file component in the processing step before and take a look into the file itself by using the xpath component. This component parses the input files and searches for
/person/city hierarchy in the input file.
If it's part of the file and the city is London, another component will log "UK message" and will write the whole file to target/messages/uk.
Otherwise it will log "Other message" and write it to target/messages/others.
That's it. Just a small tutorial of how to get started with Apache Camel and Java and a explanation of the sample project which comes with the Apache Camel Java DSL Maven archetype. I hope it helps some developers to get started which Apache Camel and Java more easily :-)
Bye,
Bennet
Be Social, Share!


